If you’re looking for ways to create security guardrails in your Kubernetes environment, then you can consider using Prisma Cloud’s integration with Open Policy Agent (OPA) to enforce runtime policies, such as protecting against spinning up unvetted images or misconfigured pods that are overprivileged. Prisma Cloud Compute simplifies the management of OPA policies across your Kubernetes deployments, and in this tutorial you will learn how to implement OPA-based policies in Prisma Cloud Compute so that you can enforce security guardrails.
Prerequisites
To follow the steps in this tutorial, complete the following prerequisites:
- Have a Prisma Cloud Console with Defenders deployed. Reach out to Prisma Cloud customer support to get access to Prisma Cloud Compute.
- Have some Defenders deployed on a Kubernetes cluster. Refer to the documentation for instructions on how to deploy Defenders.
- Have the ability to manage your Kubernetes cluster or kubectl access between get nodes and get pods.
After the prerequisites have been completed, you will have enabled the default policies in Compute.
Enable Admission Control in Prisma Cloud Compute
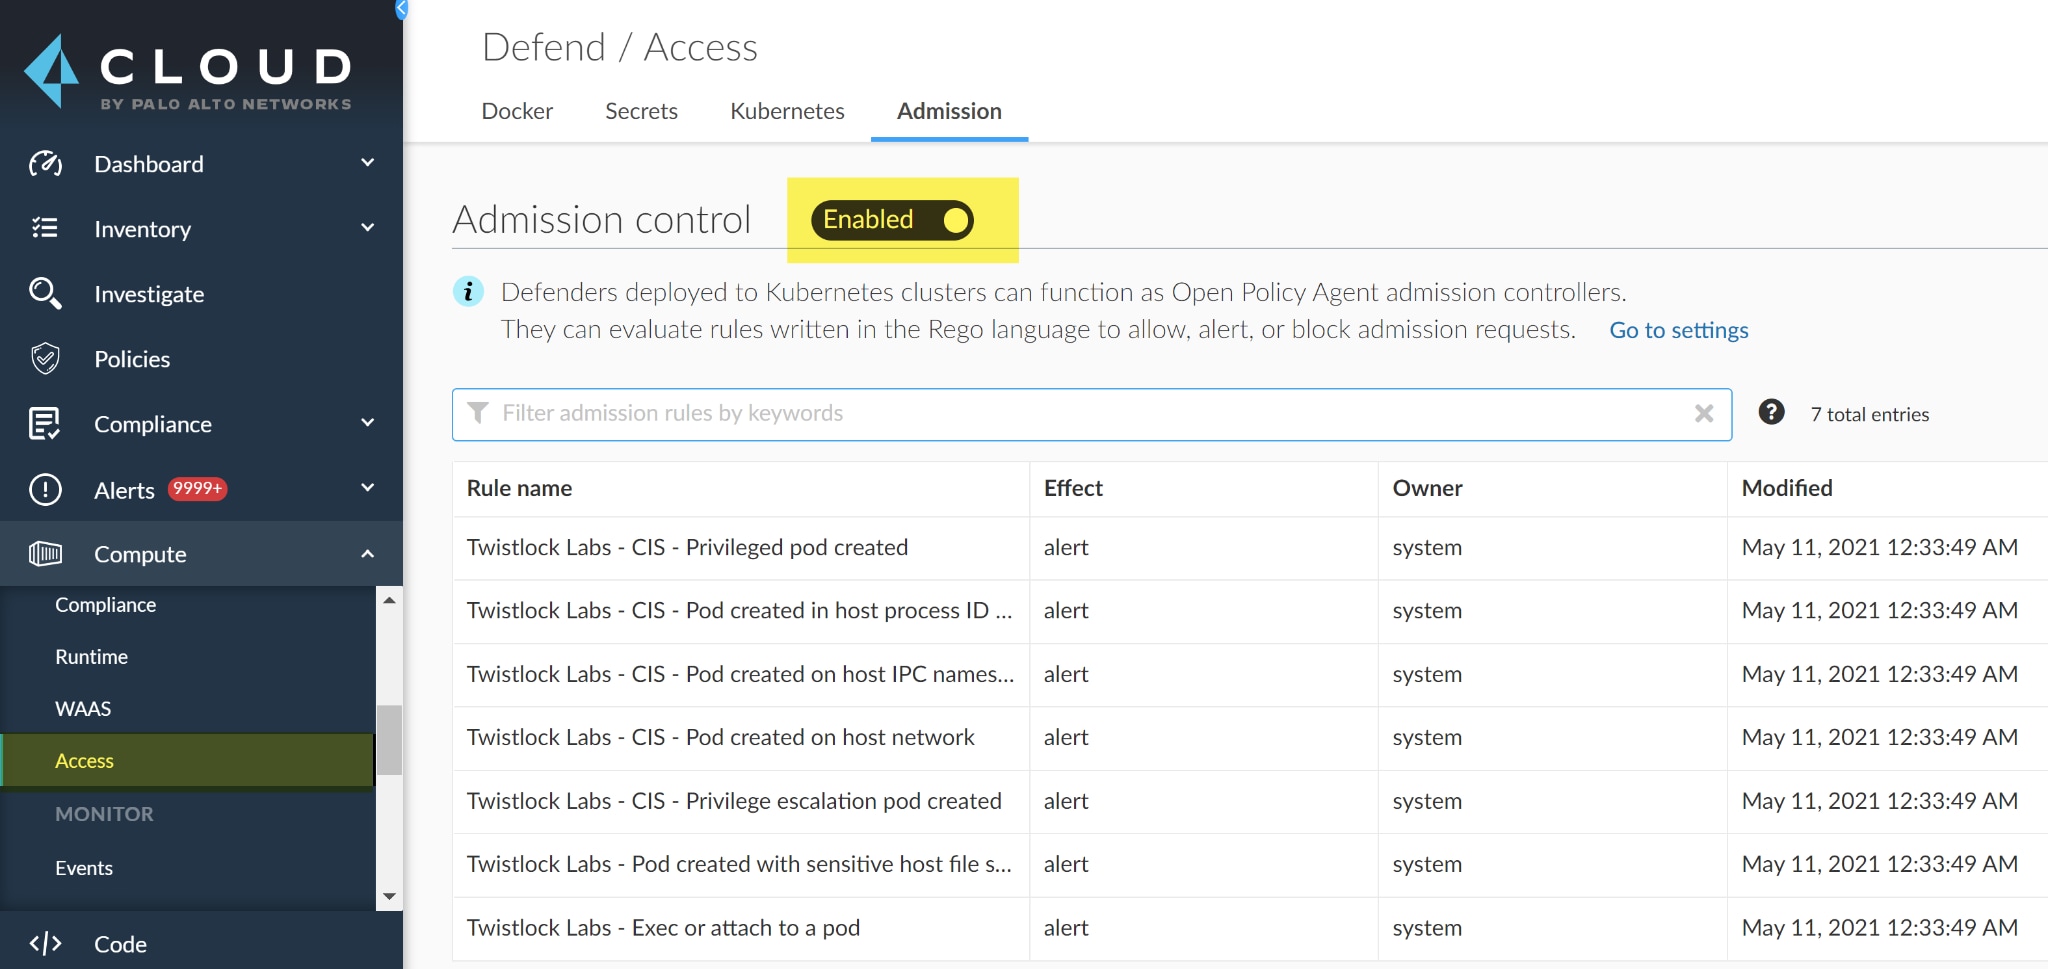
Prisma Cloud Compute comes with an admission controller which is a piece of code that intercepts requests to the Kubernetes API server. It’s built using the Open Policy Agent which has a built-in declarative language called Rego for creating your own custom policies. To use the admission controller, enable it within Compute by navigating to the Defend section of the user interface and select Access > Admission and toggle Disabled to Enabled which turns admission control on in the UI. Then, you’ll also need to deploy a Webhook into the cluster.
Deploy a Webhook
A webhook enables web apps to communicate with each other and for real time data from one app to notify another after an event occurred. After the admission control is enabled you need to deploy a webhook into the cluster to send the AdmissionReview object to the Defender so that the policies are evaluated. If no webhook is deployed the policies won’t be enforced. To deploy a Webhook, turn-on the admission controller by navigating to Manage in the UI and select Defenders > Advanced settings and toggle Disabled to Enabled.
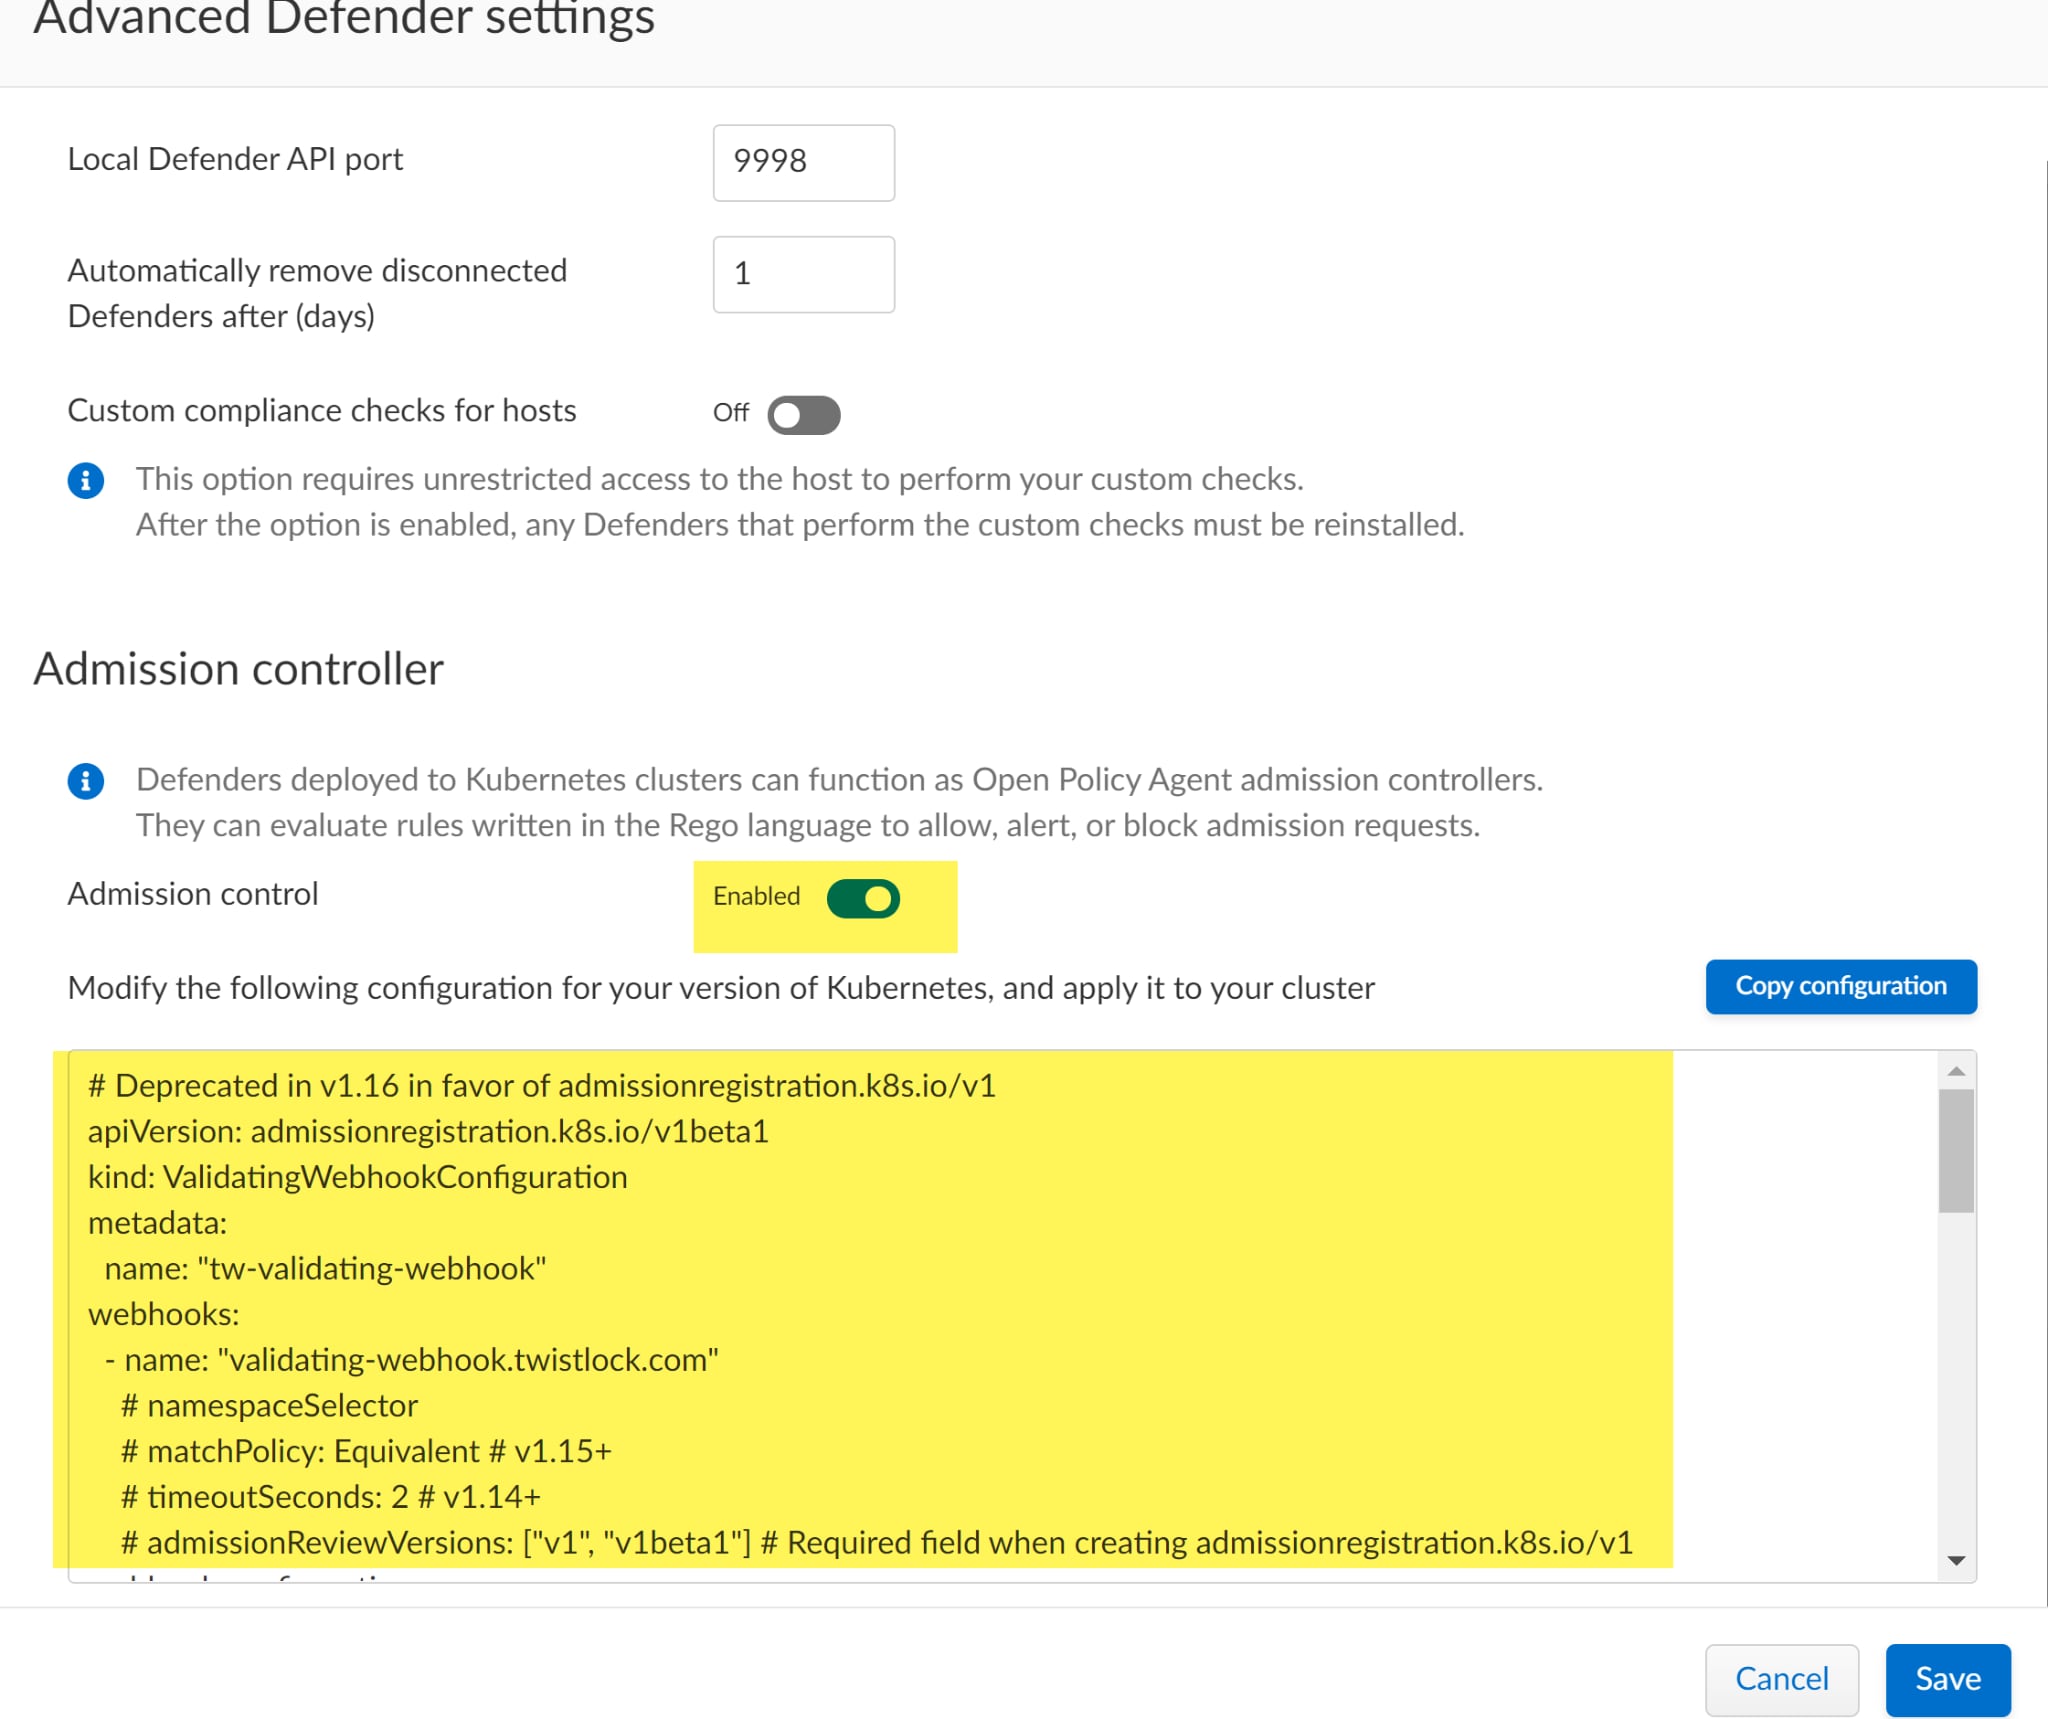
The YAML file represents the configuration details that are used to validate the webhook. You can copy/paste it into an editor like VSCode by clicking the Copy configuration button which highlights the entire file.
apiVersion: admissionregistration.k8s.io/v1
kind: ValidatingWebhookConfiguration
metadata:
name: "tw-validating-webhook"
webhooks:
- name: "validating-webhook.twistlock.com"
admissionReviewVersions: ["v1", "v1beta1"]
sideEffects: None
failurePolicy: Fail
rules:
- operations: ["CREATE", "UPDATE", "CONNECT", "DELETE"]
apiGroups: ["*"]
apiVersions: ["*"]
resources: ["*/*"]
clientConfig:
caBundle: "<snip>"
service:
name: defender
namespace: "twistlock"
path: "<snip>"
If you changed any of the default settings while deploying defenders, such as the default namespace twistlock, you’ll need to adjust those settings in this file to match. In addition, you can change the operation rules in the handbook. For example, you can add DELETE if you want to ensure that a namespace can be deleted. Next, apply the file to create the Webhook. Assuming that you named the file ValidatingWebhookConfiguration.yml, you can use the following Kubernetes command:
kubectl apply -f ValidatingWebhookConfiguration.yml
The output will be:
validatingwebhookconfiguration.admissionregistration.k8s.io/tw-validating-webhook created
The output indicates that the webhook was successfully created and that you have the hooks setup in the API. After the Webhook has been created in your cluster you should see the default policies in Admission Control by navigating to the Defend portion of the UI and selecting Access > Admission and toggling Disabled to Enabled.
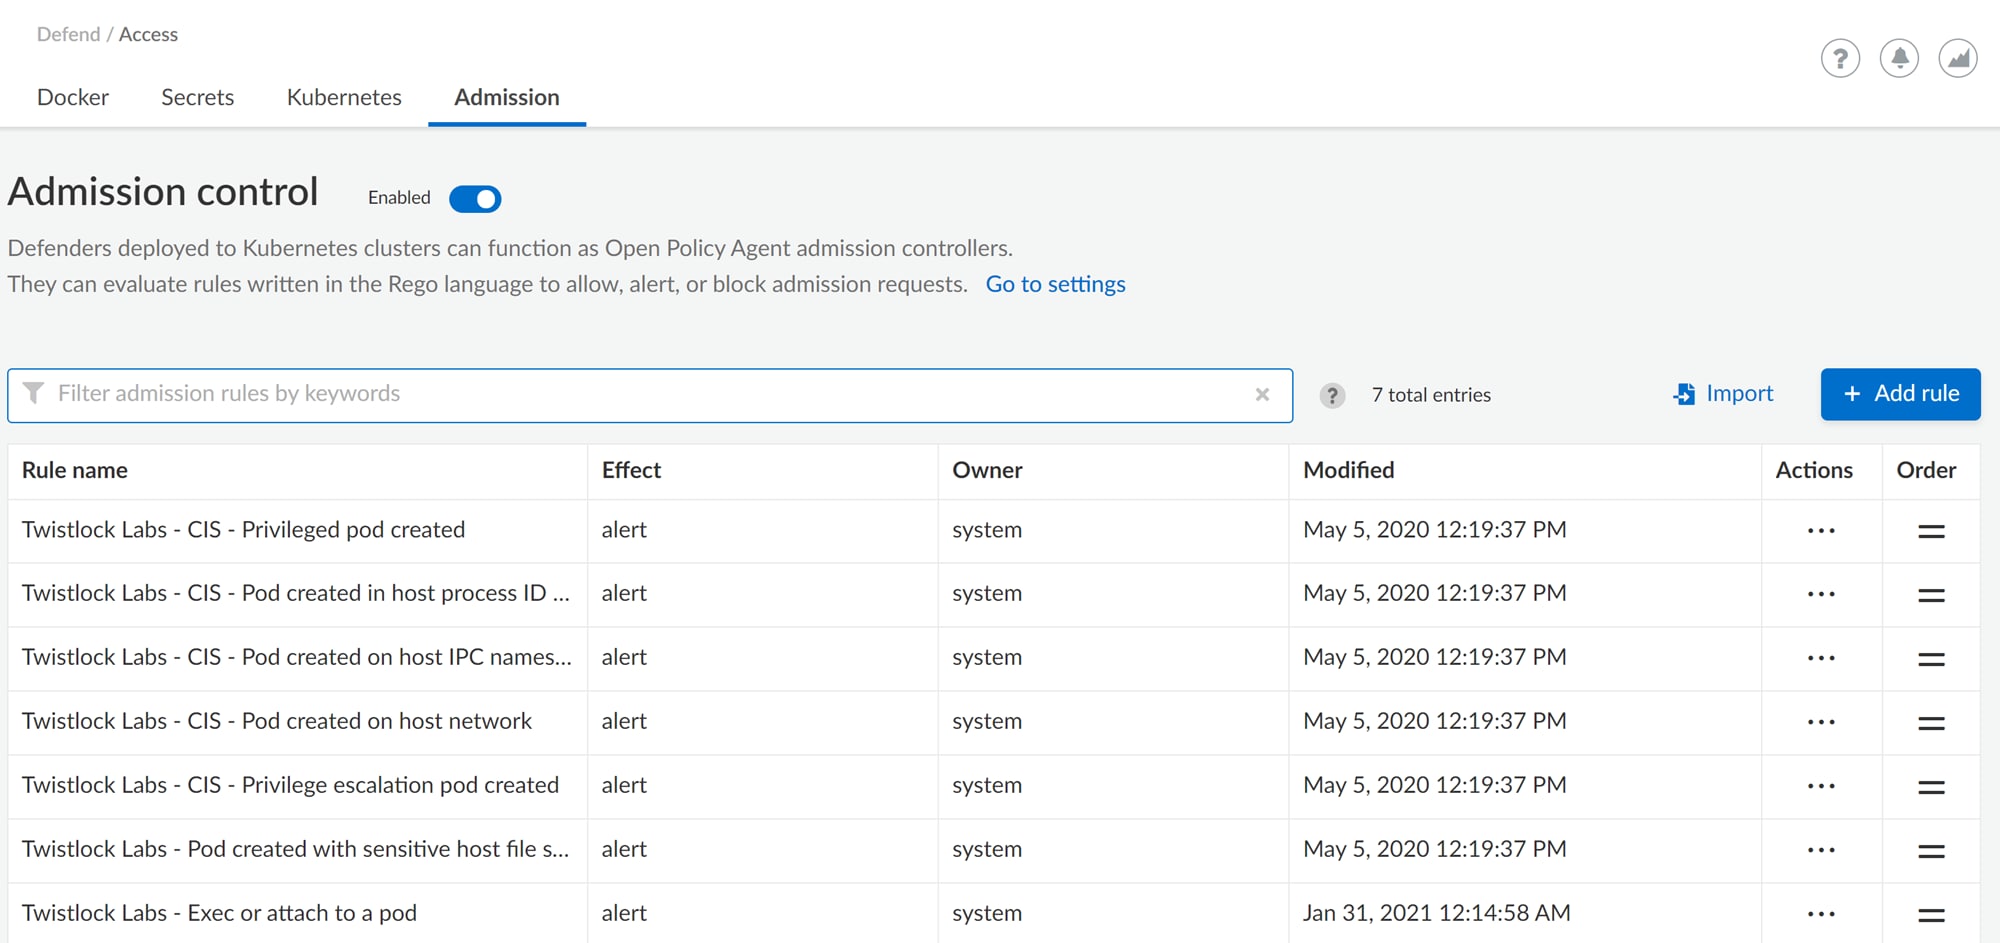
Defenders deployed to Kubernetes clusters can function as Open Policy Agent admission controllers. They can evaluate rules written in the Rego language to allow, alert, or block admission requests. Compute supplies default policies for a myriad of use cases such as detecting pods created with sensitive host file system mounts or minimizing the admission of privileged containers. If any of the default policies don’t fit your organization’s needs, disable them here. Also, extend the functionality of the default policies by adding new custom rules using Rego.
Get Started With Creating Your Own Custom Rules
Prisma Cloud Compute has a set of rules that will help you get started with creating your own custom policies. You can find examples on GitHub that will help you write your custom Rego policies along with notes for assisting you with writing your own policies. For more helpful information and how-tos, visit our TechDocs.